5 Replacing the transfer belt unit
(Video: Replacing the transfer belt unit)
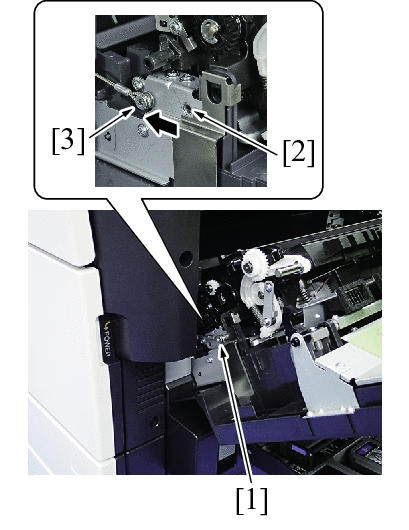
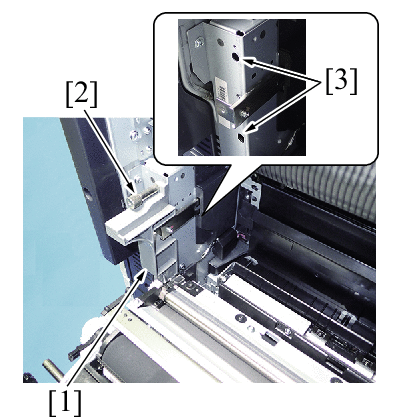
- Open the upper right door.
- Remove the screw [1], and move the stopper installing position from the hole [2] to hole [3]. Reinstall the screw [1].
- NOTE
- After the maintenance work is complete, return the stopper to the original installation position [2].
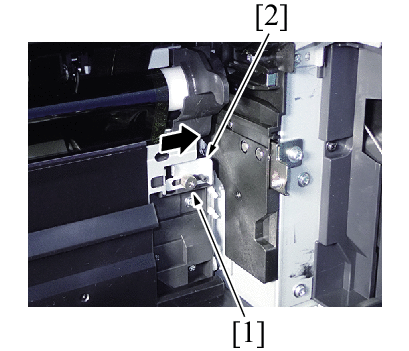
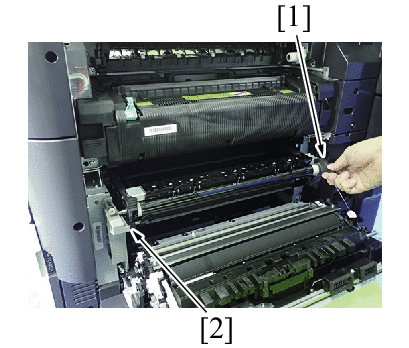
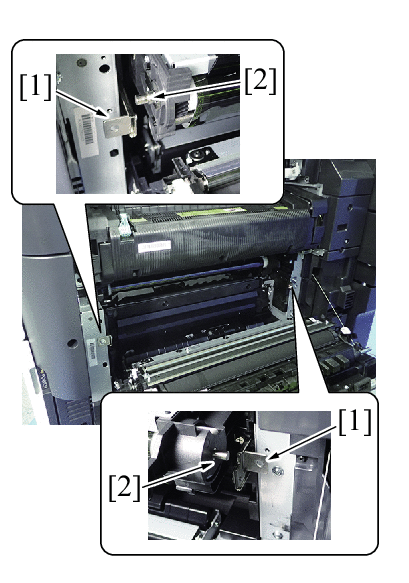
- Loosen the shoulder screw [1] and slide the transfer front guide stopper [2] toward the rear of the main unit.
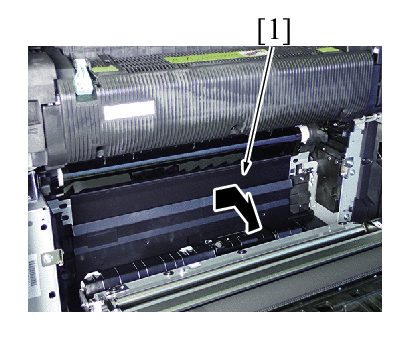
- Remove the transfer front guide [1] by sliding it toward the rear of the main unit.
- NOTE
- Always remove the transfer front guide when removing the transfer belt unit. Trying to removing the transfer belt unit with the transfer front guide attached may damage the surface of the transfer belt.
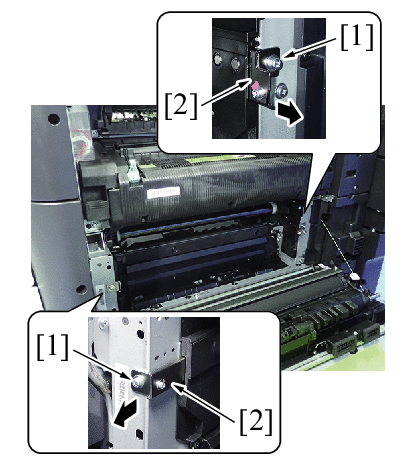
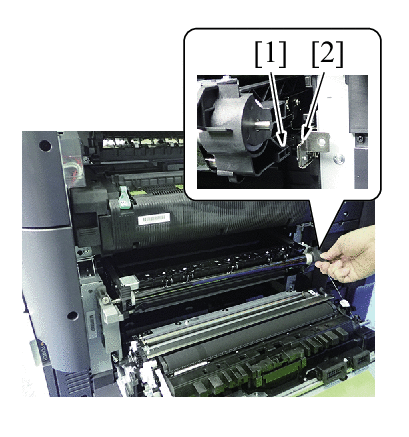
- Remove the two screws [1] and unlock the two transfer belt locks [2] by pulling them toward the right of the main unit.
- NOTE
- Completely unlock the transfer belt lock by pulling all the way toward the right of the main unit. Also, install the transfer belt unit while the lock is completely unlocked.
- Attach the transfer belt supplement rail (jig) [1] to the main unit, and fix with the shoulder screw [2].
- NOTE
- Attach so the two protrusions of the transfer belt supplement rail fits into the two dowel holes [3] on the main unit.
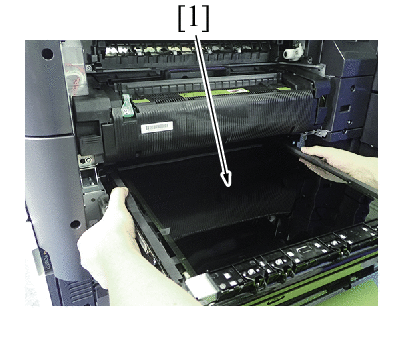
- Hold the transfer belt unit in the position [1] indicated in the figure, and pull out until it strikes the stopper [2] of the transfer belt supplement rail.
- Remove by change the holding of the transfer belt unit [1] as indicated in the figure.
- NOTE
- Do not touch the surface of the transfer belt unit.
- Cover the transfer belt unit with something such as shade cloth to protect its surface from dust or foreign matter.
- NOTE
- Take care so the contact [1] does not contact with the screw [2] of the transfer belt unit lock when removing/installing the transfer belt unit.
- To reinstall, reverse the order of removal.
- NOTE
- Insert the transfer belt unit with care not to allow its docking gear to be damaged by hitting it against the rail or associated part.
- Confirm that the two transfer belt unit locks [1] are securely unlocked, and securely insert while pressing the two press locations [2] indicated in the figure when installing the transfer belt unit.
- Select [Service Mode] -> [Counter] -> [Life] -> [New Release] and carry out new release for the transfer belt unit.
- Select [Service Mode] -> [Imaging Process Adjustment] -> [Gradation Adjust] and carry out gradation adjust.