1 Replacing the drum unit
(Video: Replacing the drum unit)
Removal procedure
NOTE
- In this procedure, the state in which the drum unit and the developing unit are assembled is called “imaging unit.”
- Open the lower front door.
- Remove the waste toner box.
- Replacing the waste toner box
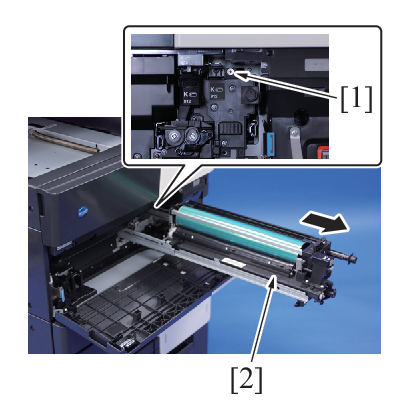
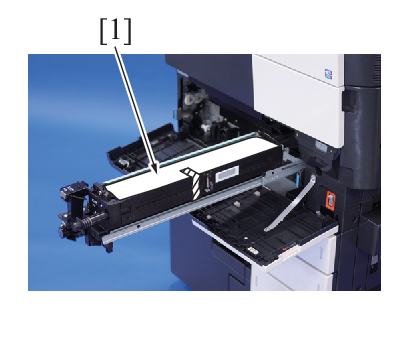
- Loosen the shoulder screw [1], and pull out the imaging unit [2].
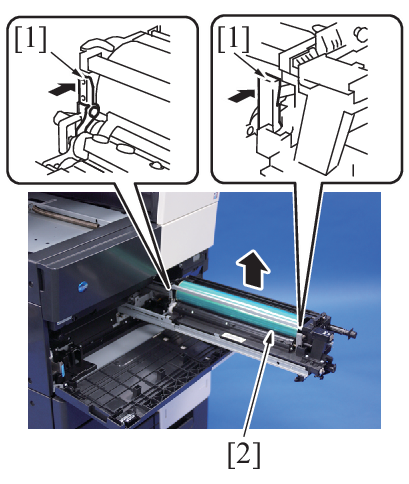
- Remove the drum unit [2] holding 2 fixing levers [1] of the drum unit while unlocking.
Reinstall procedure
- Take out the new drum unit from its package.
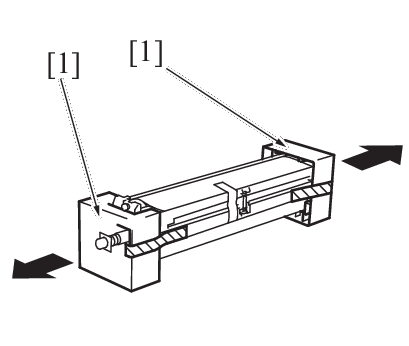
- Remove the caps [1] at the front and rear of the drum unit.
- Install the drum unit [1] to the developing unit.
- NOTE
- Do not tilt the drum unit [1] when putting it on the developing unit. (Keep the drum unit level.)
- Position the drum unit [1] so that part A of the drum unit is inserted into part B of the developing unit.

- NOTE
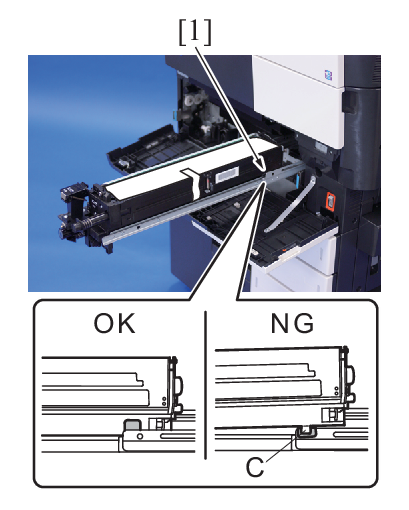
- Position the drum unit so that part C of the drum unit is inside the film [1] located on the main body rail. (Check that Part C is not on the top of the rail.)
- Remove the protective sheet [1] for the PC drum.
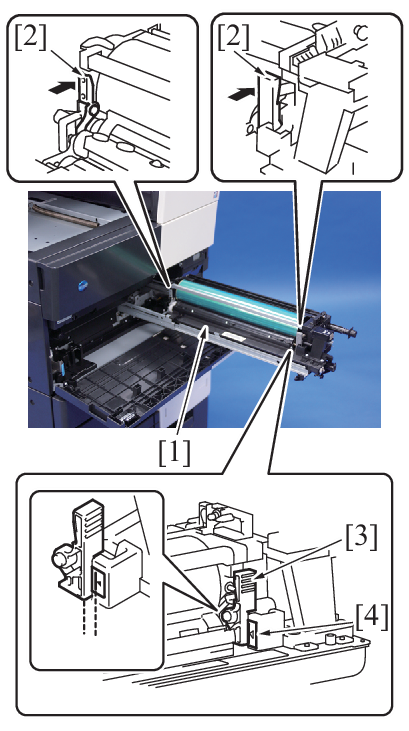
- Secure the drum unit [1] to the developing unit with the two levers [2].
- NOTE
- Push the front and back levers in the direction of the arrow at a time to secure the drum unit.
- Make sure the drum unit is securely fixed with two levers.
- Check that the front lever [3] of the drum unit is parallel to the vertical line marked on the label [4] on the developing unit.
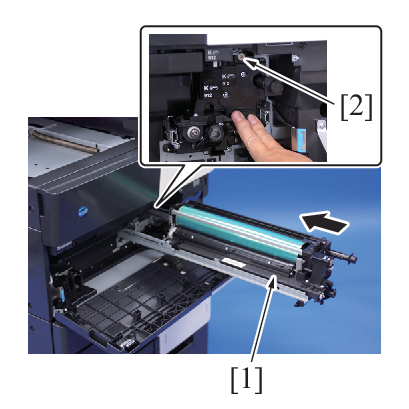
- Insert the imaging unit [1] into the machine, and tighten the shoulder screw [2] to secure the drum unit.
- Remount the waste toner box [1], and close the lower front door.
- Replace the ozone filter furnished with the drum unit.
- Replacing the ozone filter
- Replace the toner filter furnished with the drum unit.
- Replacing the toner filter
- Select [Service Mode] -> [Imaging Process Adjustment] -> [Gradation Adjust] and carry out gradation adjust.