9 Replacing the CPU board (CPUB)
(Video: Disassembly the CPU board)
NOTE
- Never use the combination of the used CPU board removed from another machine and the storage board. This combination causes corruption of stored data. Note that the combination of the original CPU board and the used storage board removed from another machine also causes the same problem.
- Never replace the CPU board and storage board with new one at the same time.
- Remove the storage board.
- Storage board (STRGB)
- Remove the memory board.
- Memory board (MEMB)
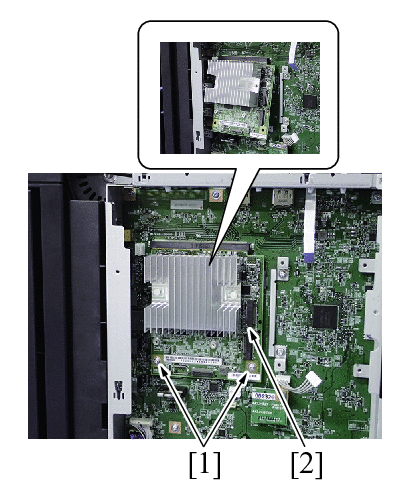
- Remove two screws [1], and remove the CPU board [2].
- NOTE
- When mounting the CPU board, insert it obliquely.
- To reinstall, reverse the order of removal.
Actions after replacement of the board
NOTE
- Be sure to configure settings in [Machine] and [Type] from [Machine Type Select] immediately after replacing the CPU board with a new one.
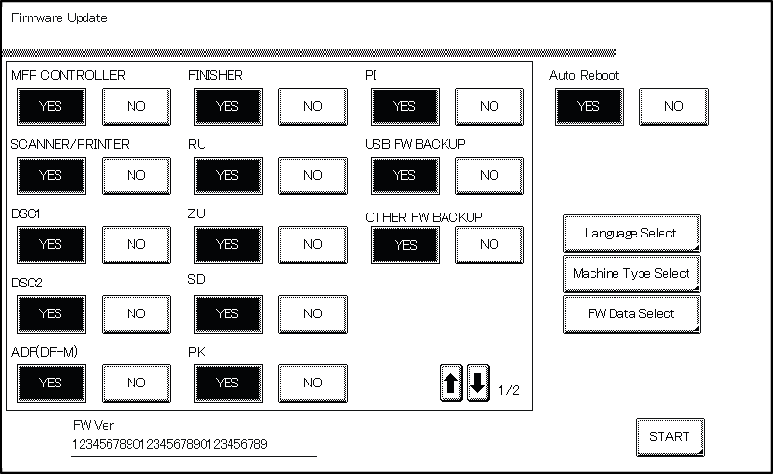
- Connect the USB memory containing the firmware into the USB port of the main body.
- Turn the main power switch ON while pressing the Stop key.
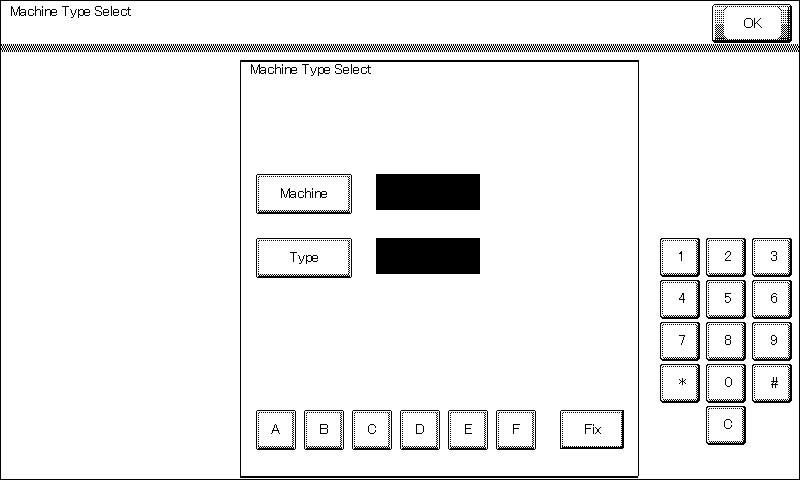
- When a firmware update screen appears, touch [Machine Type Select].
- Enter information in [Machine] and [Type] according to Table: Machine type information. Then touch [Fix].
- Touch [OK].
- Turn OFF the main power switch, and remove the USB memory.
- Turn ON the main power switch.
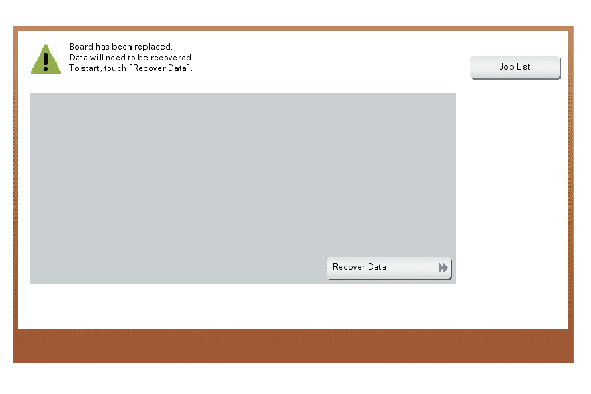
- Wait until the trouble code (C-D3C0) screen appears.
- When [Recover Data] appears on the trouble code screen, touch [Recover Data].
- When a verification message appears, touch [Yes].
- When the “Turn the main switch OFF and ON.” screen appears, turn OFF the main power switch.
- Turn ON the main power switch.
- When the machine starts up normally, check the firmware version.
- If the firmware version is not the latest, upgrade the firmware.
First four digits of the serial number | ACVX | ACVW (bizhub) | ACVW (AccurioPrint) |
|---|---|---|---|
[Machine] | 16 | 16 | 16 |
[Type] | A | 7 | 8 |